2017年2月27日月曜日

[CI][Wercker] Workflows を利用してテストのパラメタライズと並列化をしてみた

安定運用していたので、あまり見ていなかった Wercker から、もう non-Docker なやつはやめるから移行してやーってメール来たので、見てみたら Workflows という新機能が実装されていたので、ついでにその機能を使った CI に変えました。

Workflow についてはこちらを参照してください。
Manage complex CI/CD automation scenarios with Workflows

必要こととしては、wercker.yml にパイプライン処理を追加するのと、
Wercker のページ上で Pipelines と Workflows を構築する2点です。

パイプライン処理の作成(YAML)
wercker.yml の方はドキュメントとかを参考にこのように変更しました。(ちょっと長いです)
# This references the default Python container from
# the Docker Hub with the 2.7 tag:
# https://registry.hub.docker.com/_/python/
# If you want to use a slim Python container with
# version 3.4.3 you would use: python:3.4-slim
# If you want Google's container you would reference google/python
# Read more about containers on our dev center
# http://devcenter.wercker.com/docs/containers/index.html
box: python:2.7
# You can also use services such as databases. Read more on our dev center:
# http://devcenter.wercker.com/docs/services/index.html
# services:
# - postgres
# http://devcenter.wercker.com/docs/services/postgresql.html
# - mongo
# http://devcenter.wercker.com/docs/services/mongodb.html
# This is the build pipeline. Pipelines are the core of wercker
# Read more about pipelines on our dev center
# http://devcenter.wercker.com/docs/pipelines/index.html
build:
# The steps that will be executed on build
# Steps make up the actions in your pipeline
# Read more about steps on our dev center:
# http://devcenter.wercker.com/docs/steps/index.html
steps:
# A step that sets up the python virtual environment
- virtualenv:
name: setup virtual environment
install_wheel: false # Enable wheel to speed up builds (experimental)
# # Use this virtualenv step for python 3.2
# - virtualenv
# name: setup virtual environment
# python_location: /usr/bin/python3.2
# A step that executes `pip install` command.
- pip-install:
requirements_file: ""
packages_list: "requests"
# # This pip-install clears the local wheel cache
# - pip-install:
# clean_wheel_dir: true
# A custom script step, name value is used in the UI
# and the code value contains the command that get executed
- script:
name: echo python information
code: |
echo "python version $(python --version) running"
echo "pip version $(pip --version) running"
- script:
name: listup compiler
code: |
cd tools/wandbox
python iuwandbox.py --list_compiler --verbose
wandbox:
steps:
- virtualenv:
name: setup virtual environment
install_wheel: false # Enable wheel to speed up builds (experimental)
- pip-install:
requirements_file: ""
packages_list: "requests"
- script:
name: make fused
code: |
make -C tools/fused
- script:
name: setup
code: |
export PYTHONDONTWRITEBYTECODE=1
export IUWANDBOX_COMMANDLINE_OPTION="../../test/syntax_tests.cpp -f"-DIUTEST_USE_MAIN=1" -f"-Werror" --encoding utf-8-sig --expand_include --verbose --check_config"
- script:
name: c++
code: |
cd tools/wandbox
python ./iuwandbox.py ${IUWANDBOX_COMMANDLINE_OPTION} -c ${IUWANDBOX_COMPILER} --std "c++${IUWANDBOX_CPPVER}" ${IUWANDBOX_ADD_OPTION} ${IUWANDBOX_STDC_ADD_OPTION}
- script:
name: gnuc++
code: |
cd tools/wandbox
python ./iuwandbox.py ${IUWANDBOX_COMMANDLINE_OPTION} -c ${IUWANDBOX_COMPILER} --std "gnu++${IUWANDBOX_CPPVER}" ${IUWANDBOX_ADD_OPTION} ${IUWANDBOX_GNUC_ADD_OPTION}
nothing:
steps:
- script:
name: echo
code: echo "nothing to do"
view raw wercker.yml hosted with ❤ by GitHub

定義したパイプラインは2つで、wandbox と nothing です。
wandbox は iuwandbox を使用してテストコードを Wandbox に投げつけテストします。
CI サービス + Wandbox は以前にこのブログで紹介したので、そちらを参照してください。
ブログズミ: Shippable + Wandbox で C++ の CI 環境構築

wandbox パイプラインのポイントとして compiler と --std オプションを環境変数にしているところです。(IUWANDBOX_COMPILER と IUWANDBOX_CPPVER)
後述しますが、Wercker ではパイプラインごとに環境変数を設定できます
パイプラインは、YAML に書いたパイプライン処理と環境変数等のセットで、1つになります。
つまり、パラメータを環境変数にしておくことで、YAML の定義1つで、複数のパイプラインを作ることができるのです。

また、ワークフローのジョイント用に何もしない nothing パイプラインも用意しました。

wercker.yml の設定は以上です。
パイプライン・ワークフローの作成
続いて、Web 上でワークフローを作っていきます。
プロジェクトの設定ページを開いたら、「Workflows」があるのでそこを開きます。
Editor の下にフローっぽいのがありますが、まずはさらに下にある「Pipelines」でパイプラインを作っていきます。


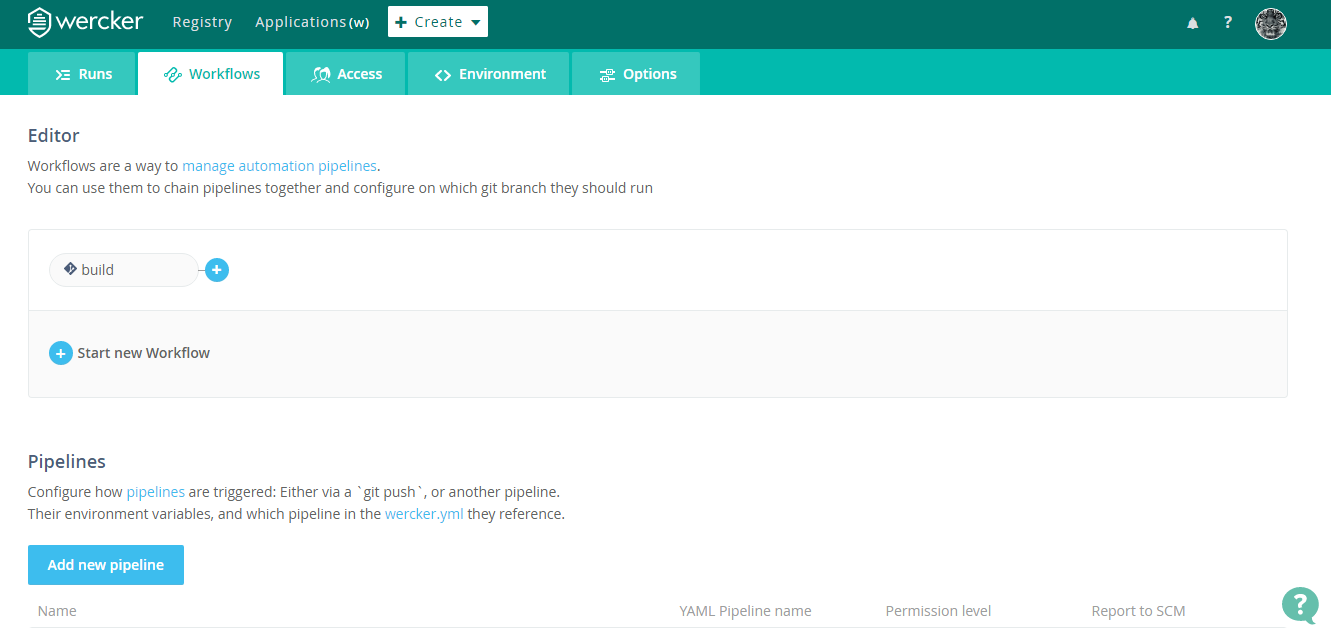
「Add new pipeline」を押すと、以下のようなページが開くので、任意のパイプライン名と YAML に定義したパイプライン処理の名前を記入します。
「Hook Type」には、「Default(パイプライン連結)」と「Git Push」がありますので、用途に合わせて選択してください。今回はパイプラインを連結していくので、「Default」を選択しました。


「Create」ボタンを押すと設定ページが開きます。
ここで環境変数などが設定できます。(今回は IUWANDBOX_COMPILER と IUWANDBOX_CPPVER を設定)


これで1つ目のパイプラインができました。
あとは、同じことを環境変数を変えつつ必要なパターン分だけ用意します。
(これ結構めんどくさいんですけどね…)


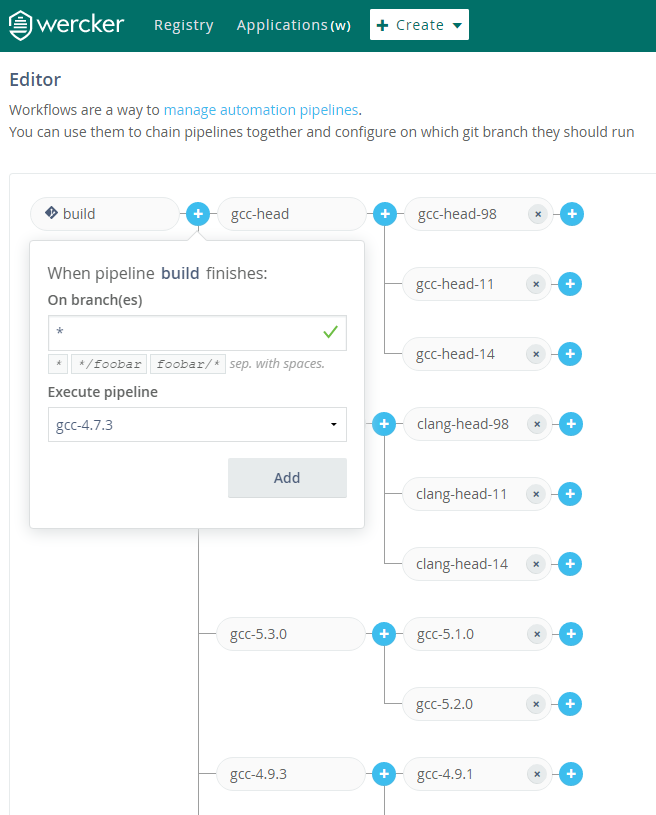
パイプラインができたら、最後に Workflows です。
Workflows のページに戻ってきたら、Editor のところにあった + アイコンをクリックします。
下の画像のように、ブランチフィルターとパイプラインを選択するポップアップがでてくるので、選んで「Add」を押します。


あとは、同様に + をクリックして好きなように連結していきましょう。


以下は現時点(2017/2)での挙動における注意点

※ 1つのパイプラインを複数使用することはできません
※ 分岐したパイプラインを Join することはできません
※ パイプラインは40個以上作れるのですが、パイプライン追加のリストに入らいないため実質40個が上限になっています。

実行結果


最後に
パラメタライズドな感じでパイプラインを定義して自由にフローを組み立てられるのは非常に便利だなと思いました。(Jenkins もこんな感じにできないのかなぁ)

あとは Join ができるとすごく嬉しいですが、なくてもすごく便利に使えると思うのでオススメです!
今回は以上です。
では。

0 件のコメント:

コメントを投稿